Keensert installation instructions
- English
- Français
- Nederlands
- Español
- Deutsch
- Português
Keensert installation instructions
On this page, you may find the Keensert installation Instructions and Keensert removal instructions.
All Keensert are created in the same manner, which means that the Keensert installation instructions and Keensert removal instructions apply to all Keensert products.
If you have issues installing or removing your Keensert product, according to these Keensert installation instructions or Keensert removal instructions, you might not have the genuine Keensert product.
See also installation instructions for Clinserts https://clinserts.com/our-products/clinserts-installation-instructions
Kindly note that these are merely the Keensert installation instructions and Keensert removal instructions.
For more details on which tools you require for the installation of your Keensert, please visit the product page of that Keensert.
Keensert installation instructions
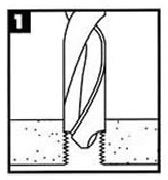 |
Keensert installation instructions – step 1 Drill the hole or drill out the old thread with a standard drill |
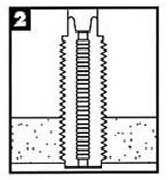 |
Keensert installation instructions – step 2 |
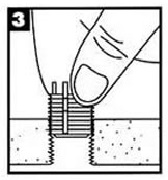 |
Keensert installation instructions – step 3 |
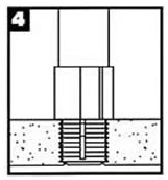 |
Keensert installation instructions – step 4
|
Questions? Contact an engineer
Keensert removal instructions
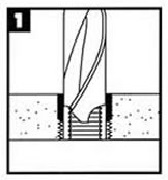 |
Keensert removal instructions – step 1 |
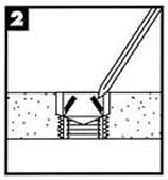 |
Keensert removal instructions – step 2 |
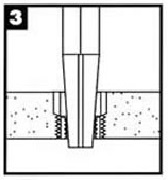 |
Keensert removal instructions – step 3 Remove the Keensert by the means of a EZ-out tool or similar tool. |
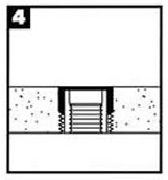 |
Keensert removal instructions – step 4 |
Questions? Contact an engineer
;
;
Keenserts is a registered brand name from ![]()
